

How to Cut Perfect Cookie Bars
Apparently, I have a knack for cutting desserts in an attractive way that others find difficult. After many requests, I decided to dedicate a post to show How to Cut Perfect Cookie Bars, squares, and brownies.
Below are ALL my Tricks for Cutting Perfect Squares and Bars. From brownies to chocolate chip bars to fruit and cheesecake bars, you can perfect your dessert-cutting skills with a few tips.
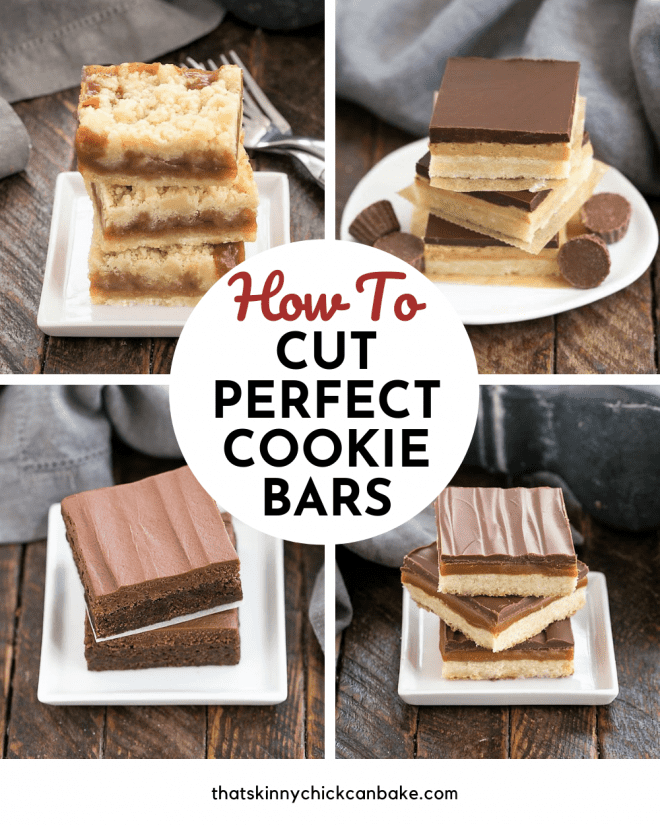
How to Cut Perfect Cookie Bars
With a few tips and lots of practice, you can have perfect dessert squares for your family and company. I don’t usually utilize a ruler, but it will help keep your bars consistent as you learn the ropes. Here is my method:
- PRO-Tip: Line your baking pan with Non-Stick Foil (affiliate links in blue). This will aid in easily removing the bars from the pan. It is much easier to place the uncut bars on a cutting board and not have to deal with circumventing the sides of the pan.
- Parchment paper can be used in place of non-stick foil. Or spray your regular foil with a Non-Stick Cooking Spray to make your own non-stick foil.
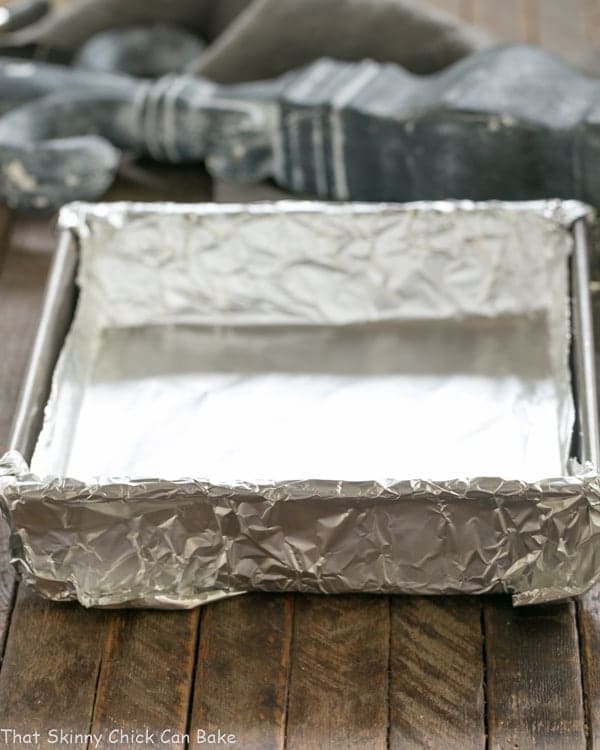
Tips Before You Cut the Bars
- Use a Small Offset Spatula (affiliate link) to spread your cookie dough evenly in the pan. The bars will look more professional if both the tops and bottoms are level.
- Before removing the bars or brownies from the pan, fully cool them on a cooling rack. Then cover and place them in the refrigerator to chill.
- PRO-Tip: Cold bars cut more cleanly than room-temperature bars. But note that they usually taste better when brought to room temperature before serving.
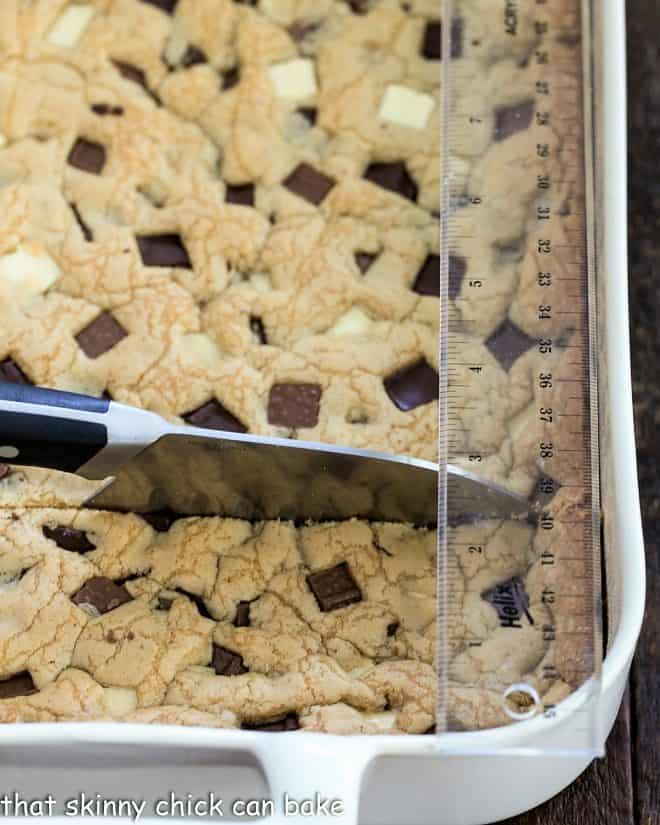
Tips for Slicing Bar Cookies
- Once chilled, remove the bars from the pan to a cutting board, using the foil as a lift.
- When I bake bars in an 8 x 8-inch pan, I like to cut the batch into 16 bars. They will each be slightly smaller than 2 x 2-inches. This way, you can start by making your first cut down the middle, rotating the pan, and making a second, perpendicular cut down the middle. From there, each of the four squares can be subdivided into 4 more squares. As you get comfortable making straight cuts, you can cut into 25 or 36 bars, but that will take a little more finesse!
- PRO-Tip: Use a ruler at first to make the straightest cuts possible.
- You may want to trim the edges of the bars before serving if you prefer 4 clean-looking sides on all your bars.
Tips for Cutting Brownies
- Many of the same techniques work for slicing brownies, such as lining the pan with non-stick foil or parchment.
- Chill the brownies for about 30 minutes before cutting to minimize sticking to the knife.
- Score or mark the top of the brownies to guide where you want to cut. Use a ruler if needed to make straight lines.
- PRO-Tip: Purchase a large plastic knife to cut your brownies. Brownies stick less to plastic than metal. Even using one of those small plastic knives you take on a picnic works well.
- Wipe off the knife after every cut is made. Moist brownies tend to adhere to the knife, and a clean knife slices better than a dirty one.
Knife Tips
- I like using a large sharp knife like my Wusthof Classic 7-Inch Santoku Knife (affiliate links in blue). But first, I run the blade through hot water (I have a hot water dispenser on my kitchen sink that is around 190°F), then dry it off. This helps cut through the chocolate topping very slickly and will also assist in cutting through chilled bars.
- Remember to use a Ruler as a guide if needed. PRO-Tip: I like using a clear plastic ruler since it’s easy to clean.
- When using a heated knife, you’ll need to wipe off the blade and reheat it at frequent intervals. I use paper towels to clean the knife, especially if chocolate is involved.
- If the bars have a crust on top, like those pictured above, I like to use the tip of a knife to poke a few holes along the line where I plan to cut. If you start slicing without doing this, you may see lots of cracking across the surface. Sometimes a serrated knife works best. You’ll need to experiment with your knives to see which works best with each variety of cookie bars.
I hope this simple tutorial on how to cut the perfect cookie bars will help make your squares and brownies picture-perfect! Please let me know if you have other tips to add or if you have any questions. Please scroll down to find some of my favorite bar cookies to try!
Bar Cookies and Brownie Recipes:
- Ricotta Cheesecake Brownies from That Skinny Chick Can Bake
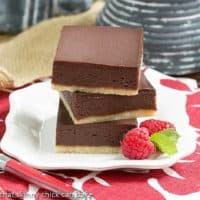
- Ganache-Topped Caramel Bars from That Skinny Chick Can Bake
- Candy Bar Blondies from That Skinny Chick Can Bake
- One Bowl Fudgy Brownies from That Skinny Chick Can Bake
- Simple Fudgy Brownies from That Skinny Chick Can Bake
- Apricot Bars from That Skinny Chick Can Bake
- Chocolate Chip Cookie Dough Brownies from That Skinny Chick Can Bake
- 90+ Bar Cookie Recipes
- 50+ Best Brownie Recipes
Frequently Asked Questions
Make sure to bake your bars in a pan lined with non-stick foil. Use the foil as a sling to remove the cooled and chilled bars onto a cutting board. Dip your knife into a tall cup of very hot water, wipe it dry, and make your first slice. Clean off the knife and repeat the heating, wiping, and slicing.
Bake in a pan lined with non-stick foil for easy removal. For the cleanest slices, chill your brownies first. Using a plastic knife is a trick that has been around for years. There are even (affiliate link) large plastic brownie knives. You can also spray your knife with cooking spray like Pam, slice, wipe the knife clean, and make another slice, repeating until the brownies are all cut.
Like with other desserts, first bake your bars in a pan lined with non-stick foil. Chill your bars before lifting them with the foil and placing them on a Cutting Board. Slice, cleaning the knife after each slice. You may also spray the clean knife with cooking spray if they are still sticking.
For a 9 x 13-inch pan, first cut the bars lengthwise into 4 equal-sized strips. Start with one cut down the middle from one short side to the other. Then, cut a slice halfway between the edge of the pan and the center cut on both sides to make 4 long strips.
Then, to make the diamonds cut on a 45º angle from one long side to the other, repeating at the same interval until the whole pan is sliced.
Use a long, sharp, non-serrated knife, heat it by running the blade under very hot water. I used my teapot and poured the hot water from the spout over the blade, then wiped it down. Repeat as needed, since a clean, hot knife will make the most pristine slices.
You May Also Like:
- How to Make Chocolate Ganache from Fifteen Spatulas
- How to Make Chocolate Shards from That Skinny Chick Can Bake
- How to Eat Salad Every Day and Like It from Barefeet in the Kitchen
- How to Make Simple Meringue Cookies from That Skinny Chick Can Bake
- How to Organize the Pantry in 5 Easy Steps from Comfortably Domestic




38 Comments on “How to Cut Perfect Cookie Bars”
Your precision, attention to detail and styling are so impressive! I love your blog and am so thankful for your delicious recipes! ????
Thank you so much, Margaret! Thanks so much for being such a loyal follower and friend!!! xoxo
Great tips Liz and your instructions are so detailed. So glad you posted this. You always have perfectly sliced cookie or cake bars. Thanks for sharing!!!
How did you know I needed this Liz! I am HORRIBLE at cutting bars, even with a ruler! Your tips are very helpful!!
Yes yuo do cut beautiful bars lol. Great tips, I think I need to chill mine like you suggest, and run the knife under hot water. I also love my Santoku Knife.
This is very helpful Liz!! I often have crumbly edges or pieces that fall off my bars – I will be referring to this tutorial often!!
I’ve always wondered how people end up with perfect squares – I’m so impatient to taste it I’m not sure I could wait to get a ruler out!!
Thanks for the great tips, Liz!! Making clean, pretty cuts is not my forte. I’m definitely going to try out your techniques!
You do have the BEST looking bars! I never would of thought to use a ruler! Thanks!
Thanks, it was like you were reading my mind. Will have to try that warm knife trick.
Your cuts are definitely perfection!! These are great tips!
Thanks for the tips Liz…yes, your bars are always cut perfectly…thank you so much for sharing it…simple tricks to make them look perfect!
I hope you are having a fantastic week 🙂
I don’t need perfect squares in my mouth – as long as they taste amazing – I am A OK with imperfection! 😉
Wonderful tips! My biggest challenge is waiting for them to cool. And I love the knife in hot water trick. I’ll definitely be giving these a try next time I make bars.
I feel like kind of a dummy right now because in all my years of baking I’ve never thought to use a ruler to make my bars even. Duh, Kelsie! I’ve always just cut hopelessly uneven bars and laughed because I’d never make it as a professional cookie slicer :). THANK YOU for this tutorial!
Thanks a lot, I end up with shabby pieces or have to depend on someone else to do the job and I am not satisfied with that too. 😀
Will try your method of cutting.
Great tips and those are perfect portioned squares!
I always love your cookie bars…thanks for the tips. I usually can’t wait till they are completely cool… :-))
Thanks for this informative tutorial, wiping down the blade is essential. I always line me pans with parchment, I found nt like using foil directly against the food because of aluminum. I use the nonstick foil a lot in food styling. Your bars are always so beautiful.
This is basically how we cut bars at baking school and in the bakery I worked in! Rulers are the bestest! You really do have a knack for it though. Picture perfect!
Amazed. The precision of cuts are just perfect I alway admire your bars and cuts … bravo!! thanks I pinned it!